Thursday, June 27, 2013

Time for a BRAND NEW web site for JeffCable.com

For those of you who have been along for the ride for the last 7 or 8 years, you may be familiar with the old jeffcable.com web site. Well...after all these years, it was time for a refresh! In this blog post I want to tell you about my dilemma, my research, my choice of web service, the challenges of rebuilding my entire web site on a new platform, and ultimately the joy and benefits of this process.

The new web site (which is live now) at www.jeffcable.com

First of all, I should tell you that the thought of building a completely new web site on a new platform was right up there with getting a root canal or being locked in a small dark closet. If I had not been forced to switch, I probably would have postponed this task for a really long time. But, as it was, I did need to make a switch. Why? Because my web site was designed on Apple's iWeb program, which Apple has discontinued.

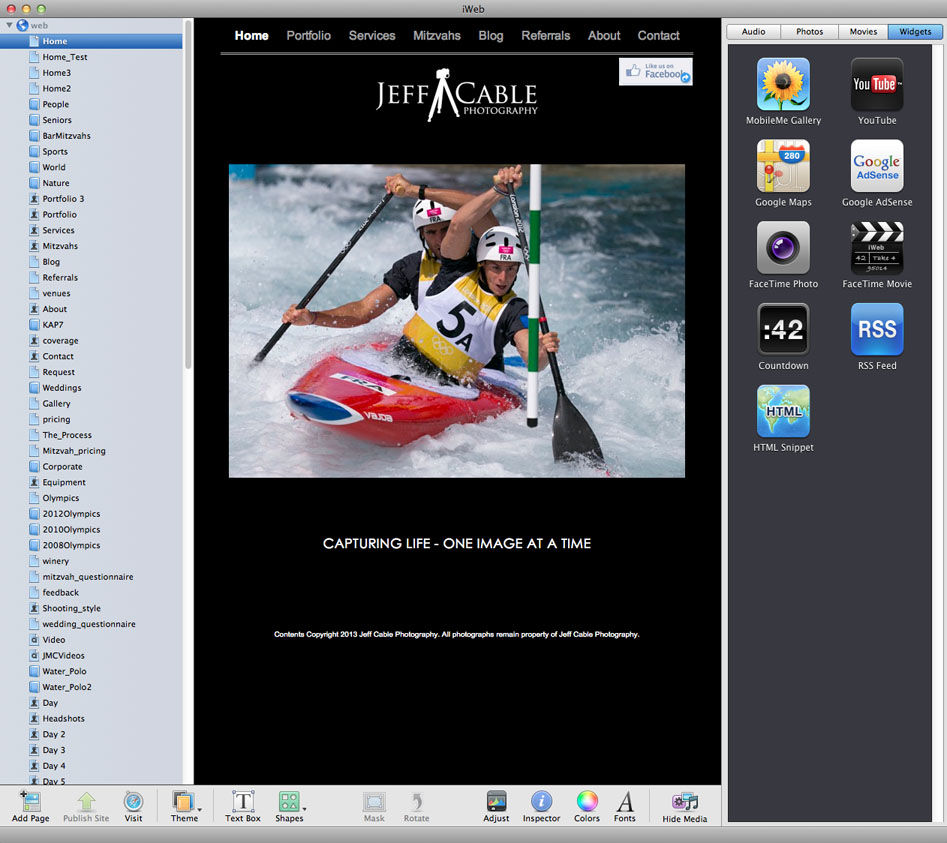
A screen shot of my old web site designed in Apple's iWeb application

I really liked using iWeb for the following reasons:

1. It was incredibly simple to setup and use.
2. I could add images by simply dragging and dropping them.
3. I could upload any web site changes with one button.
4. I could add widgets (like a count down clock or web map) with one click.

(I have to tell you now, that after using this new service, most of the iWeb benefits don't hold up any more.)

Knowing that Apple was no longer supporting the program and also knowing that a new Mac OS was coming soon (with no guarantees that iWeb would work properly on the new OS), I knew that I had to move to a new application or service quickly. As I mentioned before, it killed me to start over when I had a web process that has been working for so long.

So...I started researching Mac applications that might import all of my iWeb content. I even went as far as to download some trial versions to test the waters. None of them seemed very good and I really did not want to use a program from a tiny company across the world which could fold at any time.

A couple of months went by, and I decided to postpone the search, the same way I postpone my major dental appointments. And then one day, I got an email from a photographer asking some questions and I went to his web site. I thought "Wow, this site looks great!" so after responding to his question, I asked him which service he was using. He told me he was using Zenfolio.

I knew about Zenfolio, since we had talked many years ago, but had never tried setting up a site using their service.


But before making a major decision that I would be committed to for many years to come, I decided to ask people on my Facebook Fan Page what they were all using. As it turned out, most of them were using Squarespace or Zenfolio. And both received high ratings from my trusty followers. I figured it was time to give Zenfolio a try.


If you look at the date of my Facebook post, you will notice that it was posted on June 4th, only 23 days ago. I first logged into Zenfolio on June 5th and honestly, within 3 days I had almost all of my web site designed on their platform, and a week later I switched the C Record and A Record of my provider and I was live.

After using Zenfolio for the last 3 weeks while fine tuning the site, here is my impression:

1. I had no idea how restricted I was by iWeb. All website changes had to be made on my studio computer. So, even though I am on the road all the time, I had to wait to get back to California to update the site. Since Zenfolio is all web based, I can make changes to the site from virtually anywhere. I look forward to adding new Olympic images to the Home Page while in Sochi, Russia. Hallelujah!!!

2. Those widgets in iWeb, which I thought were impossible to reproduce, are readily available on the Internet, and simple to drop into Zenfolio. You can see this with the Olympic Countdown Clock on http://www.jeffcable.com/olympics-galleries

3. I have always wanted large slideshows on my site, and now I have them for all my portfolios. I love that!

4. I can now have drop-down menus from the main menu bar, so the key pages are available from everywhere on the site.

5. Zenfolio has the ability to sell images from their platform. I have set up one area for that (here) and may add to this in the future.

6. The interface took a little getting used to, but this is true with any new platform. Now I am familiar with almost all aspects of Zenfolio and have been able to create lots of custom pages and add some fun stuff.

7. I can make global changes to the web site. In other words, I can change font colors, background colors, even the entire theme and have all of that changed on the entire site.

8. They have live online chat so I can contact them with questions. Any they have been incredibly patient and helpful, as I have barraged them with questions.

9. I am so hooked on Zenfolio, that I contacted them, and after some discussion, I agreed to let them link to my site and use me as a featured photographer for them. (And no, I am not being paid to promote them. I always promote those tools which help us all succeed.)

So...check out the finished product at www.jeffcable.com and let me know what you think! I would love to hear your opinions and suggestions.

Note: Along with the new web site design, I decided to update the look of the blog as well. I hope you all like it.

Tuesday, June 18, 2013

Why photographers should be excited about the new upcoming Mac Pro from Apple

Many of you have seen the recent Apple announcement about the new Mac Pro, and for those of you photographers, you might wonder if this is the right computer for you. I have been waiting for Apple to address the high end market for the last couple of years, frustrated with what seemed like endless new iMacs and no super power machine. I know that I am VERY excited about this announcement and can not wait to get my hands on one of these.


I have been using a Mac Pro for more than 5 years now, and even though it is a workhorse of a machine, it is getting pretty dated. What frustrates me more than anything about the current computer is the following:


* The machine has only USB 2.0 ports and not USB 3.0. This means that my Lexar Dual-Slot USB 3.0 reader and Drobo 5D are severely slowed down! I have installed a Caldigit USB 3.0 card into my Mac Pro but it is a little flakey and does cause periodic kernal panic errors. Not fun.

* The Mac Pro does not have Thunderbolt ports. This means that my fastest data connection is through Firewire 800, which is outdated and mostly forgotten at this point.

* The processor is now 5 years old, which I like to equate to dog years. It is like having a car that is 35 years old. I want more speed!

* I only have VGA output. No mini display port or HDMI.

* The DRAM expansion is limited to and the memory is not very fast.

* The computer is LARGE and it gets REALLY hot! There are times in the summer when I dread working on my computer since it seems to generate as much heat as my furnace.


Here are my thoughts on the new Mac Pro and how it will work in my workflow:

* I am really looking forward to the having a lot more horsepower! From everything I am reading, it sounds like the new Mac Pro will be at least twice as fast as my current machine. Less time waiting means faster editing and more time shooting!

* I look forward to 4 USB 3.0 ports. Ahhhh, this will be bliss. The fast data transfer of the SuperSpeed USB will make downloading my Lexar 1000x cards and backing up a dream.


* I look forward to connecting my 30TB of hard drives to the Thunderbolt 2 ports. I have two Drobo 5D units waiting for a high speed connection. I plan on using one unit as primary storage and the other as backup.

* Faster graphics processing should help Photoshop move even quicker. I am really tired of watching large files open with the dread beach ball. Need I say more!

* I am happy to recover some desk space. I can replace this monolithic beast with something less than 10" tall and really thin. It will be like having a Mac that just went through a full term at "The Biggest Loser" camp.

* No more heater (hopefully)! This one really gets me. Sure, during the winter, it is nice to cozy up to my Mac Pro and spoon, but during the summer, the heat in my office gets unbearable and I dread editing. I also look forward to saving some energy costs. I believe that my current Mac is dimming the lights in our neighborhood.

* What display will I connect? This is a really big question right now, since I am currently using the Apple 30" Cinema Display and not sure it will connect.  I have to do a little more research on this one. It might be time to switch to the Wacom Cintiq 24HD. That would be pretty darned cool!

* Is it time for a new Apple Airport Extreme router with 802.11ac? Since I move so much data between my computers and my Drobo 5N, I am thinking that the new wireless speeds may really benefit me. Add another $200 to the price tag!

* Speaking of price, I am wondering what this little powerhouse is going to cost me. Apple has not announced pricing and options yet, but I am budgeting assuming that this will cost in the range of $3-$4k for what I want.

* I was hoping for a couple of internal drive bays. Since I currently have all 4 drive bays filled in my Mac Pro, I am used to having a lot of onboard storage. The thought of moving all of my data to external devices is a bit troubling. I know that Thunderbolt is REALLY fast, but it still freaks me out having my primary storage outside the box. I am also curious to see how fast Western Digital is going to come out with a large capacity external drive with Thunderbolt 2.

So...for now...it is a waiting game to see when Apple is going to release the new Mac Pro. But I am transferring all my data from my internal drives to one of the Drobo 5D units, investigating the display options, and rearranging desk space in preparation.

Thursday, June 13, 2013

The fun of macro photography - And it is just outside in your yard!

Someone recently asked me why I love photography so much. My answer was that photography allows me to see the world in a whole new world. All of you photographers out there know what I am talking about. You see light differently, you see patterns in simple objects and shadows, and you see beauty in all types of subjects.

It is also for this reason that I really enjoy macro photography. This allows us to photograph really small subjects that normally would be ignored by the rest of the world, and we can bring them to life. I also love that anyone can shoot macro shots without having to travel to exotic locations. Most of the images in this blog post were taken in my front yard or backyard. No major travel cost, no waiting in airports, no inconvenience, just grab the camera and walk outside.


I photographed this grasshopper in my backyard in 2006 with a Canon 30D and a Sigma 150mm macro lens. My wife saw this little guy hanging out in one of our potted plants and knew that I would love to capture this shot. I really love the contrast of colors between the insect and plant in this image. (f/4, 1/125 sec, ISO 500, 150mm)


This photo of a bee was taken in my front yard about 4 years ago. As you can see from this and many of the other macro shots, the depth of field is much narrower with a macro lens as compared to a standard lens. This photo was taken at f/9 and the focal plane is really narrow! Keep this in mind when you shoot your macro photos. If you were to shoot this image at f/2.8, only a small part of the bee would be in focus.


Like most other photos of people and animals, if the eyes are not in focus, then your photo will not be as strong (unless you are trying to highlight some other part of the subject). I shot this at f/9 to make sure that the eyes were in focus along with the translucent wings.


This photo was taken while on a camping trip in Patrick's Point, in the very northern area of California (towards the Oregon border). I came across this red snail as he worked his way across a hiking path. I was intrigued by the red color, having never seen this before. Honestly, like myself before taking up photography, most people would not notice this little creature or see the color in his body. Macro photography takes this little subject and makes it bigger than life.


I talk about the simple things in life that most people pass on by. This was a flower blooming in my backyard, and I was drawn to the symmetry of the pedals and the way that the light was hitting it so perfectly. With so many flowers and plants around us, it is rare that we stop and see the beauty of a single bloom. Using my camera and lens, I can bring these details to life to share with others.


OK, this macro shot was not in my own yard, but on the island of Maui. This gecko was not more than 2 inches long and was blending in with all the foliage. I was determined to find a photo of a gecko in these plants, and having looked for quite a while, I continually missed this little guy. Looking at this image, the viewer would not know the true size of the gecko, and I am OK with that. Knowing the narrow depth of field of the image, I shot this at f/11 to get more of the gecko in focus.And here is something really special. For this shot I did NOT use a macro lens. Since I was on a family vacation and did not want to bring a ton of lenses with me, instead I brought the Canon 100-400 lens and something really special called the Canon 500D Close-up lens. This is not a lens, but really a filter that fits in front of the 100-400 (or any other 77mm lens) to convert it into a macro lens. It is small, easy to pack, inexpensive and works very well. Most people have never heard of the 500D Close-up lens, but it is Canon's little secret that you should know about.


While teaching and shooting in the Pennsylvania area, I found a great area to photograph butterflies. This is something I would like to do more. I really love photographing their streamlined bodies and the amazing patterns in their wings.


Tulips are very pretty flowers, and I enjoy seeing them in full bloom. But, when I took this photo in 2010, my goal was to show a different view of this plant. Using a macro lens, I bring the viewer inside the pedals, to see the beauty of the stigma. Now everyone has a chance to see the explosion of orange color and not just the obvious purple pedals.


Not all macro shots need to be of plants and insects. Back in 2006, while experimenting with a new 150mm macro lens, I pointed the lens at my dog's eye and shot this image. They say that the eye's are the window's to the soul, and I think that this photo shows that. Our dog (who has since passed), was a gentle soul and I swear that you can see it in this photo. I took this at f/2.8 to make sure that only his eye was in focus and that everything else would be soft. I wanted to draw the viewers attention right to Bailey's eye, and nothing else.

So, grab your camera and a macro lens (or add an extension tube to your current lens), and go have fun! Challenge yourself to find something so small that we all pass it by, and show it to the world.

Monday, June 10, 2013

Adobe Lightroom 5 Software is now available

For all of you photographers out there who use Adobe Lightroom, you might be excited to see this. Lightroom 5 is now available for download.


Tuesday, June 4, 2013

Senior portraits - Two beautiful girls having fun in front of the camera

As I mentioned a couple of weeks ago, we are deep into graduation mode at our house, and many of our friends are in the same mode. This has been a busy time for us, going out and capturing images of the our close friends kids who are graduating from high school.

For this particular senior portrait session, we were shooting images of our good friends CJ and Jenna. Both of them are graduating from the same school and attending Santa Clara University in the fall.


We started with CJ at one of our local parks. I like to find spots where I have a dark background, so that the viewer is not distracted from my subject. For this shot, I used my Canon 1DX with the 70-200 lens at f2.8 and also added a little bit of on-camera flash (turned down by one stop).


CJ was willing to climb out to this rock for this photo, and I am really glad that we took this.


Then it was Jenna's turn to be in front of the camera. This photo was taken at the same park, but I purposely found different locations for Jenna, since I did not want her and CJ to have portraits in the exact same spots.


While I was shooting images of Jenna, my wife walked around and scouted some other possible locations. She came across this small table behind a nearby store, which really worked out great.


For this shot, on a bridge at the park, I got down low and close to the railing and shot this at f2.8. Using this aperture is ideal for a shot like this, since the foreground and background are out of focus, but Jenna is perfectly sharp.


Once we had the individual portraits completed, it was time to photograph the girls together. My wife (who is the truly artistic one in the family) decided that we needed a "2013" sign for them to hold. We looked at some local stores but did not like what we found. My wife decided to paint a piece of wood with chalkboard paint and then wrote 2013 with different colored chalk. Very clever and it worked out great.


Near the park, I found this great pathway. We asked the girls to walk away from us while I shot images of them, and then we asked them to come back towards us. I did not ask them to do this pose, all I asked was "How does it feel to be almost done with high school?" and this was their reaction.


CJ decided to change to another outfit and we took some more individual photos of her.


I helped both girls into my "favorite tree" in this park to take some more fun shots. I have photographed many people in this tree and always like the results. I think my record is a family of 5 up there in that small spot! :)


Jenna's mom had her Canon Rebel with her and shot this image of me and the girls after we had finished the session.


After all the images were retouched and ordered, I decided to try something fun for each family. I created a 2013 template in Adobe Photoshop and then added images (using clipping paths on each layer) for each character.


For their combined graduation party, I printed these 19" wide on Epson Velvet Fine Art paper on my Epson R2000 and brought them as gifts. I had fun experimenting with these and the families loved them!