A couple of weeks ago I posted on social media that I took my new Canon R5 out of the box for really cool photo opportunity. And now I get to share with all of you the images from that shoot. For the longest time I have wanted to take aerial photos over my home town of San Francisco, but it just never materialized. Well...until a couple of weeks ago.
I was talking to my friend a couple of months back and she told me that her son had recently graduated from Purdue as a pilot (not an easy task!) and was flying here in the San Francisco Bay Area. I asked Jake if he would take me up in a plane so I could take photos and he readily agreed. Then it was a matter of coordinating both of our schedules and making sure there was not a SF Giants game (which severely restricts the air space over the city. Two Fridays ago was the day!
I was going to use my Canon R3, but at the very last minute, I decided to break out my new Canon R5 which has higher resolution than my Canon R3 or Canon R6. That was a good choice! I brought a Canon RF 24-105mm lens and a RF 70-200mm lens but figured that I would be using the wider lens most often. As it turned out, that was the only lens I used.
I am excited to share the aerial images with you all.
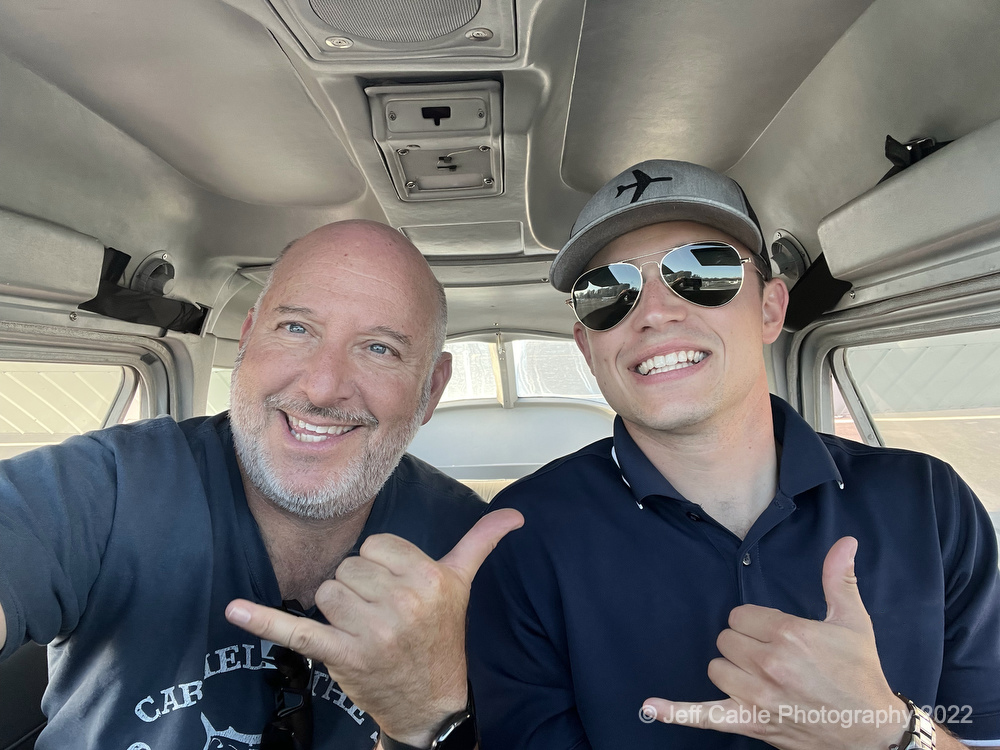
We started the flight with a selfie. All that fancy gear on board, and I used my iPhone for this one. :)
We took off from the local airport exactly at 7pm, hoping to catch golden hour light on the city and night shots as well. Once we were over the city, I opened the window and determined the best angle to shoot through. It was a small amount of space to stick the lens out, but it worked.
As luck would have it, we had a clear view of the Golden Gate Bridge, with the evening sunlight perfectly lighting this landmark. I asked Jake if he could fly out and away from the bridge and then come back in over the South Tower for this shot.
We also flew over the Palace of Fine Arts. I have photographed here many times (on the ground), but never seen it from this view. Because I had the window open, and was using a zoom lens, the force of the wind kept pushing the lens into its widest focal length. I had to hold the lens really firmly in its zoomed position in order to get this shot.
Moving away from the Golden Gate Bridge, we were heading straight for the city. What a beautiful place!
We circled the city numerous times so I could get different perspectives. I love how you can see straight up Columbus Ave in this photo.
After circling the city for a little while I asked Jake if we could fly over towards Sutro Tower. I saw how the tower was sticking out, with the late day sunlight hitting the top of the fog.
It is really interesting to see how different the tower looks from the other direction (with sunlight at our backs and the city in the background).
Before heading to the airport, I made a list of shots I wanted to capture. One of those photos was looking straight up Market Street towards downtown.
This is a similar shot to the one above, but taken vertically. This gives you a better view of City Hall (the domed building towards the front of the image and to the left).
I really liked the way the sunlight was hitting the SalesForce Tower. Jake came in around 2500 feet so that I could get the tower and the Bay Bridge in the background.
We flew right over the SalesForce Tower, so I angled the camera down and grabbed this shot, with the building half in sunlight and half in shadow.
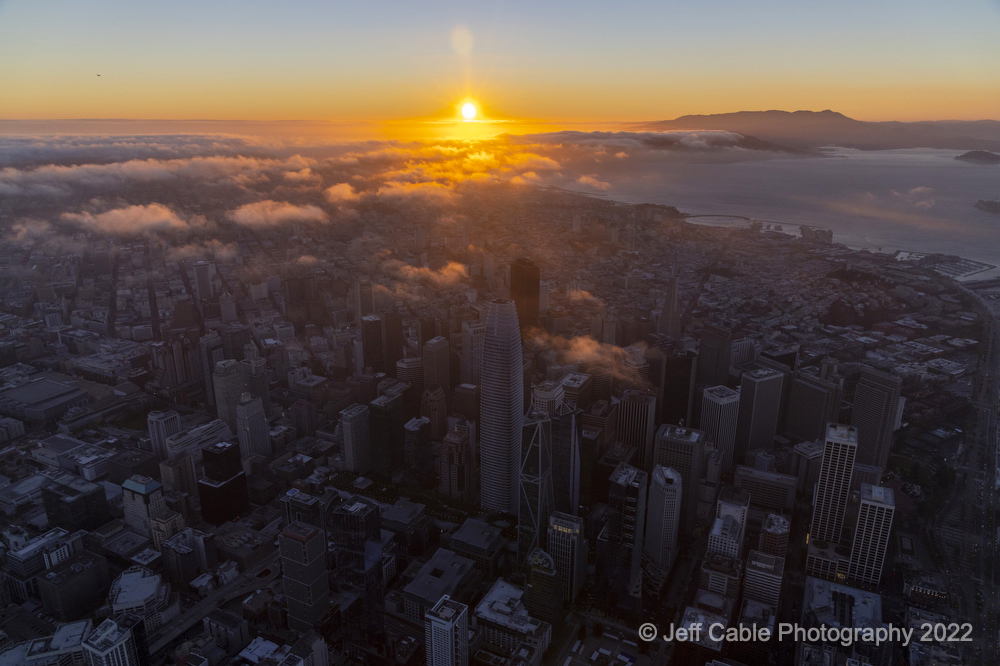
Jake flew around for a while, as I waited for the light to drop. As you can see, we had some fog moving in over San Francisco. That was fine with me as it adds drama to the photos.
This was taken at 7:45pm, with the last bit on sunlight on the buildings.
Then it was time for some sunset photos. Time to turn the ISO up to 640 on the camera.
I had Jake take the same route as before and waited until I had the setting sun directly behind the SalesForce Tower. I turned my exposure compensation to - 1 1/2 to protect the color in the sun. This darkened the city quite a bit. I then opened the shadows in Photoshop when I was processing the image.
Here is a wide shot, showing the piers, the city and Sutro Tower at sunset.
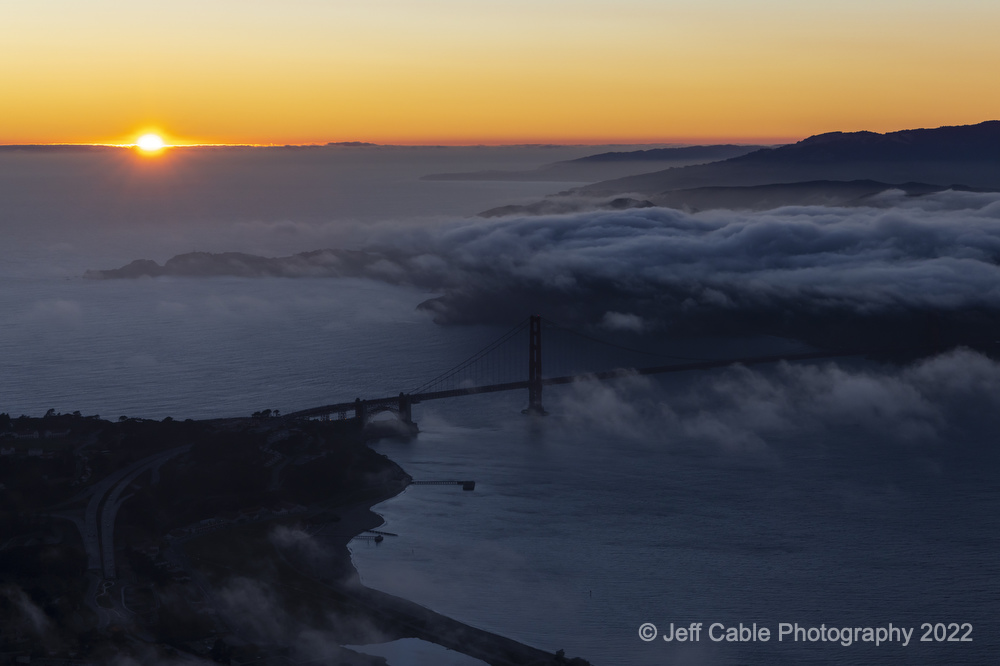
Right before the sun dropped out of site, I got this photo of the Golden Gate Bridge and the incoming fog.
We had more time to kill before I could get some night shots of the city, so Jake flew out past the Golden Gate. We had this pretty view of Marin County.
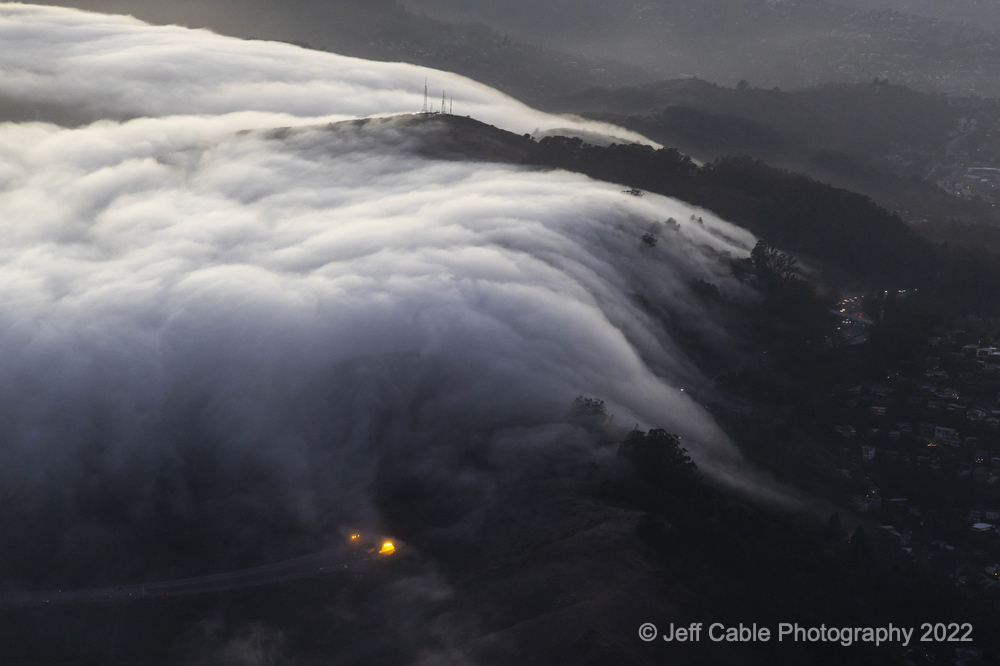
As we turned and came back in towards the San Francisco Bay, I turned and saw the fog coming over the tops of these mountains. I shot this through the back window of the Cessna 172. The yellow lights you see at the bottom of the photo are the openings of the Robin Williams Tunnel.
We got back over the city but it was still not dark enough for the shots I wanted. I checked the camera and saw that my shutter speed was dropping fast with the decrease in light. I turned my ISO up to 2500.
This is an overhead view of Pier 39, a popular tourist location in the city.
I saw this building just off of Market Street and liked the way it was framed in blue lights. Again, you can see City Hall off to the right.
Here is another shot of Sutro Tower peaking out of the fog, with a beautiful sky in the background. I timed this shot to get the lights blinking on top of the tower.
Now the lights were on and we turned back into the city to get my night shots. I had to increase the ISO of the camera to ISO 6400, and even then my shutter speed was only 1/60 sec. Combine that with the movement of the airplane and the incoming wind, this made for a pretty tough shot.
What a pretty view of San Francisco, and exactly what I was hoping for!
For these last photos, I had to crank up the ISO to 10,000. I bursted out many photos hoping to get one that was sharp.
Even though I had little light to work with, I loved the challenge of capturing these night photos.
Having captured what I wanted, it was time to head back to the airport. But not before one last shot looking down over the South of Market Street.
Jake sent me these flight maps showing our flight path for the two hours we were in the air.
If you did not know better, you would swear that we were lost. 😀
Oh wait - I have some great news for all of you! After many years of people asking me to do a photo tour in San Francisco, I have finally added one to my schedule in 2023. You can find that here.
I may even add an aerial option to the photo tour! I will blog more information about that soon.
I hope you enjoyed seeing these images from above my home city.
__________________________________________________________________________
Subscribe to the Jeff Cable Photography Blog by clicking HERE!
__________________________________________________________________________
If you are interested in purchasing ANY equipment, please click here to go to B&H Photo, as I get a referral from them if you enter this way. It does not change the cost to you in any way, but it helps me keep this blog up and running.
__________________________________________________________________________
Check out my upcoming photo tours to amazing places around the world. I have photo tours to Africa, Costa Rica, Cuba, Europe, Asia, India and more. And Canon will loan you any gear you want for FREE for any of my tours.
__________________________________________________________________________