Wednesday, September 24, 2014

My inspiration for writing this blog

I will be honest, there are times when writing a weekly blog can seem daunting. And once in a while (luckily not very often) I contemplate taking a break from the blog. What takes a couple of minutes to read can sometimes take me hours to write.
But then I get all the feedback from you, the readers, and I know that all this photography and writing is making a difference for others. These are usually people I have never met, and will likely never be lucky enough to ever have a face-to-face interaction.
With all of my travels, I never even made it over to our swim club this summer. But I stopped by on Friday and saw some friends who told me how much they liked the last blog post.
And then yesterday, I received this email from an 18 year old kid who is starting his own photography business:
******************************************
Hi Mr. Cable,

I just wanted to say that I am such a huge fan of all your work, your blog, and everything that you so willingly share. I am a photographer in Greeley, CO, just graduated high school, and you are a really huge inspiration to me. I hope that you will continue sharing all of your knowledge and great blog posts with the rest of your fans! Photography is such a difficult thing to do; yet, it is something we find ourselves "needing." :)

I just wanted to say thank you once again. You've even inspired me to start my own blog at my website (I'm also using Zenfolio, also in part thanks to you!); while I certainly have little following, I hope that someday it will change.

Again, thank you so much for simply being you.

Sincerely,
Andrew Moline
www.a2mphotography.com
******************************************
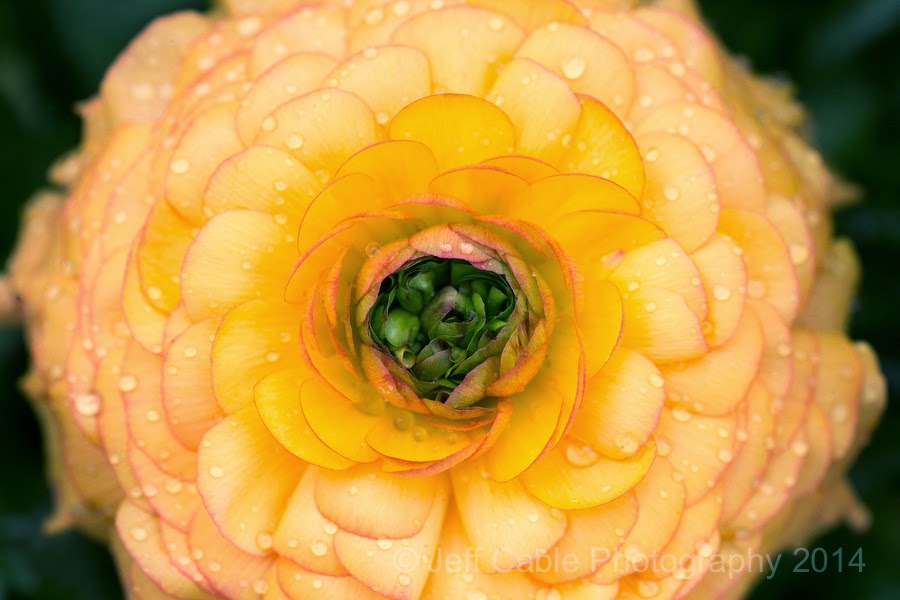
As I do for everyone who writes to me, I checked out his web site to give him feedback. This kid is doing some really nice work.

Here is the first shot from his web site:

Photo by Andrew Moline

And to know that some of that education and inspiration comes from this blog is a real motivator for me. I know that most people charge subscriptions or make people pay to learn a trade. But money is not the motivating factor behind the blog. It is the amazing stories that I hear every week, from people like Andrew. I understand what he says about the "need" to shoot, and the elation we feel when we capture a great photo. I just wish I had felt this passion at his young age.

How many times in our lives do we get a chance to inspire people all over the world? With the advent of the Internet and social media, information can easily be spread around the globe. I feel lucky to have this forum to share with you all. What started as a blog for my friends and family (to keep up with my travels) has turned into something so much bigger.

And I thank all of you for being a part of this and for sharing your interest in photography.

Thursday, September 18, 2014

Photographing flowers at your local nursery

A while back, I made a couple of trips to our neighborhood nursery to photograph some of their flowers. I grabbed my Canon 1Dx and Canon 100mm macro lens and had some fun. My goal was to capture some of the colors and patterns of the plants, and try to isolate some of the cool details that we might not normally see.


I started shooting wide shots of the flowers, looking for the most interesting colors.


I also came across these leaves and enjoyed the simple green colors. I shot this at f4 while focusing on the one leaf, therefore letting the leaves in the foreground and background fall out of focus.


Keeping with the "leaf thing" I shot this photo. I really liked the patterns here. This was cool, but I quickly decided that I wanted to get even closer.


When photographing flowers like this, you really need to move around a lot to find the right composition. For this shot, I kept getting lower to the ground and moving left and right to get the composition you see here. I made sure to focus on the anthers (which generate the pollen) of the middle flower, drawing the viewer's eyes to the center of the photo.


Using the same grouping of flowers, I moved directly overhead and shot this. A totally different perspective, but equally interesting. At least, I think so...


Then I got down low to the ground and shot this photo of the flower at eye level. This is a perfect example of how one plant can yield totally different visual results.


While examining these same flowers, I noticed that the underneath of the flower was just as interesting as the top view. And since my goal was to show details usually not seen, I saw this as a cool opportunity to bring attention to something that is usually ignored.


I have always been attracted to repeating patterns, and really liked this composition. There is something very simple and tranquil about this photo, as compared to the shot below which is more vibrant and visually stimulating.


These flowers reminded me of fireworks.


Using the Canon 100mm macro lens to it's fullest, I got right into the middle of these flowers to show more detail.


My second trip to the nursery was just after a light rainfall, and I was hoping to capture some macro shots showing water drops on the flowers. And this is exactly what I found when arrived.


For this shot, I decided to make the water drops the subject, and not the flower. For this, I isolated just one side of the flower, and focused on a couple of water drops.


I used a narrow depth of field to isolate a small slice of the flower. I wanted to isolate a few of the smaller water drops, and keep the center of the flower in reasonable focus. (Photographer's tip: When you are shooting macro photos, where the depth of field is more narrow than usual, I encourage you to try different apertures. Try shooting at f/4, then switch to f/8, f/11, f/16 and so on. This will give you some different perspectives and give you a choice of which you like the best.)


This final shot was one of my favorites from the two photo shoots. I decided to photograph only half of the flower from above, and maintain focus on all the water droplets. I think that this is a good example of how an image can be pleasing without having to show the whole subject. This same method is widely used when photographing portraits, when the subject is cropped tight.

For those of you who live in cities, where you don't have a lot of wild foliage to photograph, I encourage you to head down to your local park or nursery.  Remember to ask permission and be respectful of the workers and patrons. And most importantly, experiment with your camera and have fun!

_________________________________________________________________________________

If you are interested in purchasing any camera equipment, please click here to go to B&H Photo, as I get a referral from them if you enter this way. I would really appreciate that.

_________________________________________________________________________________

Wednesday, September 10, 2014

Review of the Sigma 50mm 1.4 Art lens - Is this my sharpest lens now?

I am lucky because I get to try out a lot of different camera gear. Sometimes I have companies offering to send me products to try and other times I may contact them to see if I can try a new backpack, tripod or lens. Well...about a year ago, I saw Sigma demonstrate a prototype of their upcoming 50mm 1.4 Art lens. I heard them comparing this lens to a Zeiss Otus lens (which costs $4000) and I was skeptical. Could Sigma really build a lens for $949 that could not only rival the Canon 50mm f/1.2 L series lens, but compare to the Zeiss Otus lens?


Last month I saw a notification that Sigma was finally shipping this lens, so I called the folks at Sigma and asked to borrow a lens to test. I got it last week, and the box has been sitting on my desk begging to be opened. I finally had a chance to open the box and put the lens to the test, and I was BLOWN AWAY at the results. 

I connected the lens to my Canon 5D Mark III, grabbed a small object to photograph and shot a couple of photos. Looking at the LCD on the back of the camera, I was stunned at the sharpness of the image. But then I thought "the Canon L series lens which costs $1500 must be just as sharp", so I put that lens on and shot the same small object. It wasn't nearly as sharp. I started thinking of all the reasons why my test would yield such different results, and then set up a test removing all those variables.

I set up my Gitzo tripod and connected the Canon 5D Mark III to my Acratech ball head. I set the camera in timer mode so that there would be no movement of the camera. All the photos taken here were shot at f/1.4 and ISO 100. I then shot photos of a little DJI camera that I had laying around.


Here is the result using autofocus with the Canon 50mm 1.2 lens (with the focal point on the lens of the DJI camera).


...and a close-up of that same shot.


Keeping the camera in the same position, I then switched lenses to the Sigma 50mm f/1.4 lens and used autofocus pointed at the same point of the object.


This is a close-up of the shot taken with the Sigma lens. Look at how much sharper the lens is!


I then wondered if it was the autofocus of the lenses, so I switched the camera to manual focus and took the same set of photos. This was the photo taken with manual focus using the Canon 50mm 1.2 lens.


Using Live View to zoom in and get as sharp as possible, this is the best that I could get using the Canon lens.


Then it was time to use manual focus with the Sigma lens.


The Sigma lens was tack sharp once again.


I decided to try once more with a different object. So I found this small flashlight on my desk and gave it a try again. I held a piece of paper to make sure I was not mixing anything up. This is the photo with the Canon lens and manual focus.


And the same shot with the Sigma lens. You can definitely see the difference in clarity. As a matter of fact, I was amazed at the clarity I was seeing in Live View mode. It was so apparent even while shooting.


Here is a close-up view using the Canon 50mm 1.2 lens.


And just for the fun of it, I tried the same test with the Canon 50mm 1.4 lens. Here is a close-up view using that lens.


Here is a close-up view using the Sigma 50mm lens.

After doing all these test shots, I started thinking that the results might be different at a lower aperture, so I repeated the same test (this time using the Canon 50mm f/1.2 lens, the much less expensive Canon 50mm f/1.4 lens and the Sigma 50mm f/1.4 lens) and shot the same photos at f/6.3. Here are the results of that test.


Results of shooting the Canon 50mm 1.2 lens at f/6.3. (Click on this photo to see the full res image)


Results of shooting the Canon 50mm 1.4 lens at f/6.3. (Click on this photo to see the full res image)


Results of shooting the Sigma 50mm 1.4 lens at f/6.3. (Click on this photo to see the full res image)

All three photos look good when zoomed out like this, but when you click and look at them at full resolution, you can definitely see a difference in the quality, even at a smaller aperture.


And here is a real-world photo I took of my dog Cooper, using the Sigma 50mm lens. As many of you know, shooting at f/1.4, you have to be dead-on with your focus as the depth of field is really narrow. For this shot, I focused on Coopers left eye.

I started this review with the clarity of the lens, because honestly, to me that is the most important feature to us photographers. Now I would like to tell you a couple more things about this lens.

The first thing I noticed when taking the lens out of the box, was the weight. At 28.7 oz, you can tell that this lens is packed with a lot of glass. It is taller and thinner and heavier than it's Canon counterpart. And the Sigma lens looks really great too, with a nice mix of polished and matt black finish. It feels solid in the hand and has a very smooth focus ring.

I did notice that the lens attached to the Canon camera with more force than I am used to. The Canon lens twists on very easily, while the Sigma lens took some more force to get it firmly connected. I don't know if this is due to the newness of the lens, but I don't remember other lenses, even when new, taking such force to attach.

The Sigma lens would also let me focus a little closer to the object than the Canon lens. Looking at the specs, it appears that the Sigma lens will focus 2" closer than the Canon 50mm f/1.2 lens.

I also noticed that the Sigma lens was slower than the Canon f/1.2 lens. With the camera set in Aperture Priority mode with the same ISO (100) and Aperture (f/1.4), you would assume that the shutter speed would be the same with both lenses, but that was not the case. Where the Canon lens would shoot at 1/80 sec, the Sigma lens was at 1/50 sec. This makes me wonder how these two lenses would compete in a dark environment. Remember, I shoot a lot of events where the lights are low.  Here is what I am thinking now: Even if the Sigma lens is 1/3 stop slower than the Canon, I can turn up the ISO on my camera. I would prefer to have a little higher ISO and a lot sharper photo. There is only one way to find out, and I can't wait to give this a try this weekend when I shoot my next event.

_________________________________________________________________________________

If you are interested in purchasing any camera equipment, please click here to go to B&H Photo, as I get a referral from them if you enter this way. I would really appreciate that.
_________________________________________________________________________________


Thursday, September 4, 2014

Photographing models at the Greg Gorman workshop (includes clothed and nude photos)

For those of you who follow the blog regularly, you know that most of my portraits are of high school seniors, kids and families, and I do not usually photograph models. A good friend of mine, Greg Gorman, invited me to join him for one of his workshops. For those of you who don't know, Greg is a world renowned portrait photographer who has photographed just about every Hollywood star you can imagine. He teaches an amazing workshop at his home in Mendocino, CA. In this workshop, he teaches how to photograph models, mostly in the nude.

Some people think nude photos are all pornographic, and others see the beauty in the human form. I debated for quite a while, whether or not I should post a blog with these photos, with the hope of not offending anyone. But I am really proud of the photos and wanted to show them to you all.

I decided to write this blog, starting with photos of the models (female and male) clothed, and then move to suggestive nudes. This blog then ends with a handful of the nude photos. If you are not interested in seeing the nude photos, I encourage you to stop at the warning message.

I assume that, if you scroll down and look at all the photos, you are comfortable with the material. The decision is yours. I truly hope that all the blog readers see the beauty in the photos and see these as art.

Again...the choice is yours...


This photo of Tiffany was taken outside, in Greg's backyard, which is on the beautiful coastline of California. All the white that you see behind her, is the fog that had rolled in during the morning. I cropped in on this image, keeping a lot of negative space on the right, since it seemed to work Tiffany's portrait. I took all the photos with the Canon 1DX and 70-200mm 2.8 IS lens.


Another shot of Tiffany, but instead of shooting her unclothed, I asked if she had any sheer material. I really like the suggestive nude photos better than the fully unclothed shots. Partly because I find it more intriguing, but I also think that I am more comfortable shooting portraits with clothed models. Trust me, this workshop put me well outside my comfort zone, which I think is a good thing.


I was photographing Tiffany in this doorway, when she looked down. I love the look and asked her to pose that way for me.


And here is a photo of her looking right at me. This really highlights her pretty eyes. Which one do you like better?


I really liked this pose, with Tiffany looking pensive and relaxed.


As I mentioned, we photographed both male and female models during the workshop. These photos were taken at a local winery. We asked Dan to dress up in a Western outfit to fit the scene. I asked him to lean against the fence, and then I hopped onto the other side of the fence to shoot this photo. I really like the way that the lines of the fence lead your eyes to and from Dan.


We found this old truck and had Dan pose for us there. To get the light on the left side of his face, we used a silver reflector to bounce the sunlight on him. I moved to an angle where Dan would be in front of the tree so that he would stand out from the dark background.


This tree was on the edge of the vineyard, and seemed like a perfect place for Dan to rest.


With Dan's chiseled good looks, I had to take a close-up portrait of him. It was an interesting lesson about the human face, as Greg taught us to find the best angles and poses for each model.  


Later, we had Dan change from the Western clothes to sporting attire, to get a different look. We shot these photos to simulate a sporting catalog session. I tracked Dan with the camera's servo focus as he ran from the shade into the sun. And I had someone holding a reflector to my right (on Dan's left side) to throw extra light on him. As Dan ran up the road, there was only one or two seconds when he was in the light of the reflector. All the others were rejects.


The third model was Stephanie, and I shot this photo of her in Greg's studio. Not being a studio photographer, I worked on proper placement of the softboxes to get the right light on her face. After shooting this, I turned it to B&W using Google's NIK SilverEfex Pro 2

***WARNING - THIS IS WHERE THE NUDE IMAGES BEGIN. IF YOU AR NOT COMFORTABLE WITH VIEWING UNCLOTHED MODELS, PLEASE STOP HERE.***


This is one of my favorite photos from the two days of shooting. We were outside, on Greg's property, and Tiffany was modeling for our group. As I mentioned before, I prefer suggestive photos to the fully nude, and I think that this photo shows just enough of her form to show her beauty without showing everything. 


I really liked the lines of the vineyards, and asked Tiffany if she would walk through the vineyards sans clothing.


After she walked half way down the row of vines, I asked her to stop and stand. I saw her looking up for a brief second and loved the lines of her body. In the photographic world, we call this the "S Curve" and it really does accentuate the beauty of the female body. I shot this at f/2.8 to have perfect focus on her, but make sure that the grape leaves in the foreground and background were out of focus.


This photo of Tiffany was taken from inside Greg's house. I asked her to go outside and stand close to the window pane, and shot this photo through the window blinds. Could I have shot the photo with the blinds pulled up? Sure. But I really like the effect created by the blinds. I focused on the blinds and shot this at f/5.6 to maintain reasonably good focus on both Tiffany and the window treatment. I also tried this with Tiffany closer and farther from the window, to get different effects.


This is a photo of Dan that I took in the studio. Again, this was part of my learning how to properly light the human form. Let me tell you, it is much easier to photograph a clothed model, where imperfections can be covered with the clothing.


At one point, one of the groups was photographing Dan, and we had finished our time with Tiffany. Since Tiffany was just hanging out, the other group asked her to go inside the pool house and look through the window. She gave this look at Dan showering. and we all cracked up.


I hope that you all enjoyed these photos and see them, like I do, as art. I learned a lot during the 2 1/2 days and feel that I have a better understanding of photographing people.

_________________________________________________________________________________

If you are interested in purchasing any camera equipment, please click here to go to B&H Photo, as I get a referral from them if you enter this way. I would really appreciate that.
_________________________________________________________________________________