Thursday, July 27, 2023

Paris 2024 Summer Olympics - Exactly one year away!

For most people, when the Olympics are a year away, they think "I look forward to watching the Olympics next year", but for me, when the Games are a year away, my stress level goes up a little. This means that I have a short window of time to complete the rest of my planning. 


Just to give you context, the process started more than a year ago, with me applying for my credentials. I got my confirmation from Team USA back in February that my request was approved, with the level of credentials I requested. Now the real work begins.
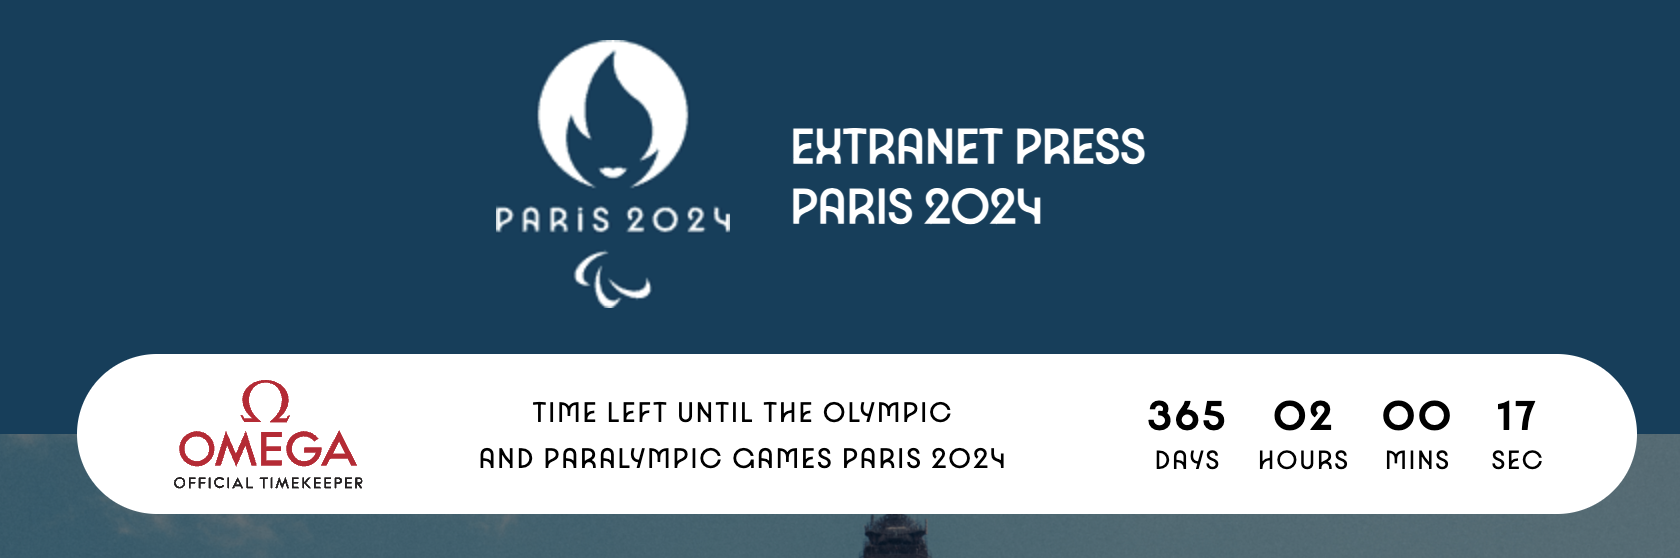

I got an email reminding me of the one year countdown, and it reminded me to log into the Paris 2024 Extranet site to check on everything. The one thing I need to lock down right away is my housing. As always, I will be photographing many different sports while at the Olympics, but my primary team will be USA Water Polo (Men and Women).  As it turns out, like in some of the previous Summer Games, the competition will change to a different venue and location once the teams reach the medal rounds. This means that I will have two primary locations to account for.


The preliminary rounds for water polo will be held in Seine-Saint-Denis, outside the center of Paris.


The medal rounds for water polo will be held in La Defense. 

This means that I need to select a press hotel (subsidized rates) that is located where I can easily get to both sites. Google Maps shows that the two locations are approximately 20 miles from each other with a 30 min drive time. But this travel time could vary depending on whether I am using a press bus or the metro. 

I have already reached out to the Accommodations team in Paris to determine my options.

The next thing I will work on, after I have figured out the housing, is my contract with the team. But since we have worked together for many years, I am not too stressed about that. And once I can book flights (since the airlines don't book out one year in advance), I will get that locked in.

I am very excited for Paris Olympics for many reasons. The first and foremost is that it will be the first Olympic Games in a long time where we hopefully do not need to worry about Covid. For those of you who have followed me through the past couple of Olympics, you remember the massive challenges I faced going (and not going) into those. The second reason I am excited about these Olympic Games is that they are located in Paris! If it is anything like the 2012 Summer Olympics in London, the locations and backdrops could be amazing.  

Rendering from the Paris Olympic Website

And for the first time ever I hope to be photographing the opening ceremony outside of a stadium! If you have not heard, the Paris Organizing Committee (POCOG) is going to have the opening ceremony on the Seine River, with each team floating down the river with their teammates. This is the first time ever that an opening ceremony will be held outside of a stadium. This should be very cool (although potentially a logistical nightmare for those of us who need to get back to the press center right away to post images right away). 

As we get closer to the Games, I will keep you all up to date on the plans, the challenges and the successes.

__________________________________________________________

Subscribe to the Jeff Cable Photography Blog by clicking HERE!
_________________________________________________________________
If you are interested in purchasing ANY equipment, please click here to go to B&H Photo, as I get a referral from them if you enter this way. It does not change the cost to you in any way, but it helps me keep this blog up and running.
_________________________________________________________________
Check out my upcoming photo tours to amazing places around the world. I have photo tours to Africa Costa Rica and more. And Canon will loan you any gear you want for FREE for any of my tours. 

_________________________________________________________________  

Sunday, July 9, 2023

Photographing the Sensorio light exhibit in Paso Robles!

Last month I made a visit to Paso Robles, California which is an area known for it's wineries, breweries and olive groves. But I really wanted to visit the area to see the Sensorio light show, which is a really cool site to see. The Sensorio light exhibit is a walking tour which comprises of thousands of solar powered fibre-optic lights which line the local hillsides, and are constantly changing in color. 

I have seen photos of this in the past and really wanted to see it for myself.

I took this photo at 8:52pm after the sun had set and the lights and colors were becoming really pronounced. But wait a second..let me start from the beginning. 


We purchased tickets well in advance, and arrived early enough to relax and watch the sunset. While the sun was still in the sky, I wanted to walk around to see some of the 15 acres. I brought my Canon R5 camera with the Canon RF 24-105mm lens. They do not allow tripods or "professional cameras" to be brought in to the area, but I figured that my one camera and relatively short lens would be allowed, which it was. (More on this in a minute)

I loved the way that the bare bulbs looked with the setting sun behind them, so I got down low and captured this image. 


As I always teach to my photo tour guests, a good photographer looks in all directions for photo opportunities. I turned around and saw that the moon was visible behind me. I walked to a spot where the moon would be just above the tree and grabbed this frame.


After walking around the area for half an hour, we decided to get some wine and cheese, sit down, and watch as the sun set and the lights became more visible. 


It was almost 9pm before the sky darkened and the lights really came into full effect. At this point, we started our walk. Typically it can get very hot in Paso Robles, but our visit to the area was perfect with really nice weather during the day and a cold evening. It actually got so cold that we were huddled by the fire pits before heading off on our walk.


There were so many places to stop and watch the lights, that I had a hard time figuring out where to capture my photos. I typically looked for good leading lines and trees as my supporting subjects.


As I turned in different directions I would get more (or less) light in the sky. I was also using exposure compensation in the camera (between -1 and -2) to darken the scene. 

I did this for two reasons:

1. It darkened the sky to a deep blue color.
2. I kept the colored lights from being overexposed.


I did most of my photography at the blue hour, which allowed me to still have nice color behind the trees.


Since I could not bring a tripod with me, I had to rely on the in-body camera stabilization, lens stabilization, and me holding the camera steady. Most of the images you see in this blog post were taken with the following settings:

Mode: A/V
ISO: 3200
Aperture: f/4
Exposure comp: -2
Shutter speed: 1/4 sec

During the retouching process, I would increase the exposure when needed and then run Topaz DeNoise on the images to take out any of the digital noise (grain).

Honestly, these newer cameras have such amazing stabilization that I am often shooting handheld at really slow shutter speeds with amazing results! 


It was now 9:06pm and I was able to capture the colored lights, the blue sky, and the moon in one photo. This is one of my favorites of the night. 


Just 5 minutes later, we lost the blue skies and I was now working with the grey/black sky. I had also taken most of the images that I wanted, so I decided to try something different. For this shot, I changed the camera settings to ISO 1600 (at f/4) which gave me a half second exposure. I pointed the camera at a nearby tree and then zoomed the lens out during the 1/2 second. This created the light streaks that you see here.


From the same location, I changed the camera to ISO 3200 (still at f/4) which gave me a 1/4 sec exposure and I twisted the camera to give me a different look.


I saw all these lights winding their way up to a tree and thought they made a perfect leading line. I turned the camera to take a vertical image and really like this one. I just wish I had taken this during the blue hour, as I prefer the deep blue sky to the muddy black sky you see here. 


This photo was taken at 9:12pm and was the last image showing any light in the sky.


When walking all the way to the back of the exhibit, they have some interesting light sculptures, including these light towers made out of wine bottles.


This is a close-up view of the wine bottles.


Also in the back area is a new display called "Fireflies" where almost 10,000 lights are blowing in the wind. Each of these clusters has flexible "tentacles" of lights which dance in the wind. It is really beautiful.


I took tight shots of the fireflies but also zoomed out to catch images like this one, with the sculptures, the tree, and the moon.


These last two photos were taken at close to 10pm. The light you see in the background (top right side of the image) is light pollution coming from buildings in the distance. This image was taken handheld at ISO 3200 (like most of the others).


This photo was taken at with the Canon R5 at ISO 1000 with a shutter speed of almost 3 seconds. For this shot, I rested the camera on a rock wall, set the 3 second timer, and avoided any shaking of the camera during the exposure.

If you live in California or have a display like this in your area, I would really recommend visiting. And if you do visit, I hope you will take your camera and have as much fun as I did!


__________________________________________________________

Subscribe to the Jeff Cable Photography Blog by clicking HERE!
_________________________________________________________________
If you are interested in purchasing ANY equipment, please click here to go to B&H Photo, as I get a referral from them if you enter this way. It does not change the cost to you in any way, but it helps me keep this blog up and running.
_________________________________________________________________
Check out my upcoming photo tours to amazing places around the world. I have photo tours to Africa Costa Rica and more. And Canon will loan you any gear you want for FREE for any of my tours. 

_________________________________________________________________  

Tuesday, June 27, 2023

New 3-day San Francisco photo tour!

I have been teaching photo tours all over the world for many years now, but have never taught in my home town. I have photographed in San Francisco so many times, and every time I do, I think about hosting a photo tour in this amazing city.  

Well, the time has come for me to share my favorite photo locations in San Francisco with my guests! 

I picked the month of October, since the weather is usually at its best during this month. The tour will begin on October 9th and run through October 11th, and we will be photographing day and night. Here is the tentative itinerary for the trip.

**************************************************************

Day 1:


Golden Gate Bridge (numerous locations)

Palace of Fine Arts

Baker Beach

Lands End

San Francisco Bay


Night: Golden Gate Bridge from the Marin Headlands


Day 2:


Painted Ladies

Lombard Street

Fishermans Wharf

Coit Tower


Night: Wide shots of the San Francisco skyline and bay


Day 3:


China Town

City Hall

Haight Ashbury

Golden Gate Park

Bay Bridge


Night: Sunset shots over the city


**************************************************************

All of this is subject to change, depending on the weather and other factors, but suffice it to say that we will see all the best that San Francisco has to offer. 

Here are some images of locations I will be taking you to:


Of course, you can't photograph San Francisco without capturing the Golden Gate Bridge.


There are many vantage points which give you very different photos of this iconic structure.


The Cable Cars (and learning how to motion pan them - like this photo)


The Palace of Fine Arts


The Painted Ladies


Downtown


Chinatown


Some really great lessor known areas.
 

Views of Alcatraz


As I mentioned, we will be taking photos during the day and into the evening. 


I even have the option for my guests doing an optional aerial tour of San Francisco. I have a good friend who is a pilot and does aerial tours of the city. I have flown with him numerous times, capturing images during the day... 


...and after sunset. 


I can help arrange the optional aerial tour for any of my guests.

The cost of the tour includes:

* Hotel 
* All meals
* Photo instruction (of course)
* Luxury transportation and a full time driver (so we don't need to worry about parking)
* Security (good to have in many locations and at night)
* Loaner camera gear from Canon

The cost is: $3950.

I put this on my web site a while back and have already had 4 people sign up. We have room for 6 more people. If you are interested, please contact me to grab one of the remaining spots.

I have also added new photo tours to some of my favorite places, like Costa Rica, Africa, Japan, Indochina and more for 2024 and 2025. You can check those out HERE.

__________________________________________________________

Subscribe to the Jeff Cable Photography Blog by clicking HERE!
_________________________________________________________________
If you are interested in purchasing ANY equipment, please click here to go to B&H Photo, as I get a referral from them if you enter this way. It does not change the cost to you in any way, but it helps me keep this blog up and running.
_________________________________________________________________
Check out my upcoming photo tours to amazing places around the world. I have photo tours to Africa Costa Rica and more. And Canon will loan you any gear you want for FREE for any of my tours. 

_________________________________________________________________  

Thursday, June 15, 2023

Printing big and BIGGER with my Canon printers!

In the last blog post, I talked about the importance of color calibration. I also said that I would follow up that blog post to cover the final step in the process...printing. 

For the last 8 years I have been relying on the Canon Pro-1000 printer. This printer has been an absolute work-horse for me, printing the bulk of my 4x6, 5x7, 8x10 prints for clients, and really anything up to 16x20. Then, about 6 months ago I added the larger Canon Pro-4100 printer to my arsenal so that I can print REALLY large images.

Actually - I have three Canon printers if you want to include my multifunction printer (to the left), which I generally only use for printing documents and scanning. The Canon Pro-1000 printer is right next to my computer for easy loading of smaller photo paper.


This is the Canon Pro-4100 printer taking up a lot of space in the office, but worth it. I posted this photo of my granddaughter and I (taken by my daughter-in-law) on social media last week because it is one of my favorites. I had to print that one big!

But I am getting ahead of myself here. Before I talk about the printers, I need to further explain the importance of color calibration as part of the printing process. Regardless of whether you are printing on a large format printer or a small one, the color calibration is really needed because nobody wants to spend the money on the ink and paper only to find out that the colors and brightness are off. Having the Spyder X2 connected to my computer means that, not only are my colors going to be correct both on screen and from the printer, but also that the brightness of the monitor will be set so I can properly set the exposure levels before the images is sent to the printer. With this combination, I have complete confidence knowing that what I output will be accurate, without having to reprint over and over.

Unlike many photographers, I do not use Adobe Lightroom very often, but instead choose to do all my retouching directly in Adobe Photoshop (using Photo Mechanic for all my culling and organization). Once I have done all the retouching in Photoshop, I then choose which printer I am going to output to. Most of the time this determination is made strictly on the size of the final print. If the print is going to be smaller than 16x20, then I still default to the Canon Pro-1000. Anything larger and I use the new Canon Pro-4100, which can print all the way up to 44" wide by 100 feet. 

Some people have asked me why I decided to get the Canon Pro-4100. Honestly I got this beast for the following reasons:

1. I have always wanted to be able to print my images really large, to frame and put in the house.

2. I periodically have clients who want large prints and I like being able to create them quickly.

3. I had a corporate client who wanted images printed for an office building, and it seemed more cost effective to print them here than to order a large quantity from my color lab.

One of the features I love the most about the Canon Pro-1000 is the paper loading system. Unlike many other printers, this one uses a vacuum system to pull the paper in. My previous printer (from another company) would bring paper in crooked all the time, creating a lot of waste and frustration. In all my years using the Pro-1000, I have never once had the paper go in off angle. The Canon Pro-4100 uses paper rolls, and has also been perfect in the loading and printing department. Even the process of replacing a roll is incredibly easy. I just put the roll of paper onto the bar and the printer does the rest.

As for the quality of the prints, they are always remarkable. The colors are perfect and the resolution is museum grade. There is nothing like seeing your favorite images printed in the highest quality and large!

For both printers, my favorite media is the Lustre paper and I use this 90% of the time.  


These are some of the photos that I printed for the office building. I generally lay them down on the ground for a couple of days to get the curl out of the paper (since they are coming off of a roll). 


Ever since getting the new printer, I have been having fun framing favorite images and putting them up at the house. When I get tired of them. I switch them out for new ones.

If you are interested in getting any of my photos in a large print, just send me an email and tell me which image (any from my web site or blog) and I can print that for you at a reasonable price. Then you can enjoy these large photos as much as I am. 😀

__________________________________________________________

Subscribe to the Jeff Cable Photography Blog by clicking HERE!
_________________________________________________________________
If you are interested in purchasing ANY equipment, please click here to go to B&H Photo, as I get a referral from them if you enter this way. It does not change the cost to you in any way, but it helps me keep this blog up and running.
_________________________________________________________________
Check out my upcoming photo tours to amazing places around the world. I have photo tours to Africa Costa Rica and more. And Canon will loan you any gear you want for FREE for any of my tours. 

_________________________________________________________________  

Wednesday, June 7, 2023

The importance of color calibration - especially when printing images!

This blog post is one I have been meaning to write for at least 6 months, and I just never got around to it. It involves an important topic for all of you out there who want to create the best photos possible. We all invest in great cameras, lenses and other accessories, but many fail to finish the process in the proper way. 

As I have always said, almost every image needs some finishing, whether it is slight tweaks to the exposure, shadows and highlights, white balance, or removing distractions in the photo. This can be done in PhotoShop, Lightroom or other editing programs, but there is a step that should be done before this happens. This step is color calibration.

I take the time to frame a shot, choose the best ISO, aperture and shutter speed and am excited to get back to my computer to see what I captured. But how do I know that my computer monitor is showing me the proper brightness and colors? Without color calibration, I can not trust what I am seeing on my computer. 

Think about it...if my monitor is not calibrated and is over saturating the reds, then I would be removing some of the red in the retouching process. Then when I go to print the image, the red color would be under saturated and the image would not look it's best.


For the last 10 years, I have been using the Datacolor Spyder calibrators to assure accuracy in my images. A couple of months ago, Datacolor sent me a prerelease of the new Spyder X2 calibrator to try prior to it's launch. I found that this new calibrator makes the process so easy and fast. 


The software is designed to make the process easy for any user, not needing to be a color expert (which I am not).  Each step of the way I was walked through the choices, and then I hang the calibrator in front of my display and let it do it's thing.


The calibrator even measures the ambient light in your room, and helps you set the proper brightness for your monitor prior to doing it's thing. 

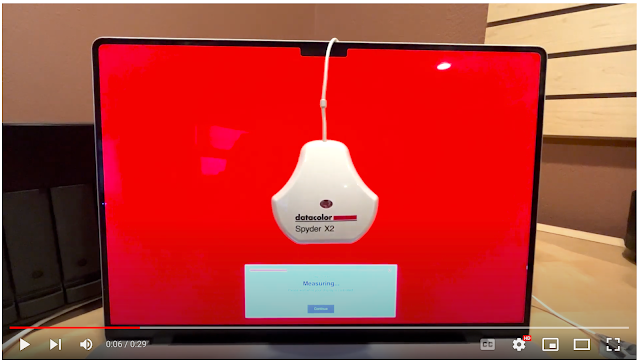
You can watch as the Spyder software generates many different shades of each color, with the device measuring that each step of the way. Once the calibration is complete (which only takes a minute or so), you can see the difference between the uncalibrated monitor and the calibrated monitor.


You can see the calibration happening here:

And you can see the difference by clicking the video above or by clicking here.

The Spyder comes in two different versions, the Spyder X2 Elite and the Spyder X2 Ultra. If you have an HDR monitor or a newer monitor that has "high-brightness" you will want the Ultra ($30 more), otherwise the Elite will do just fine for you. Either way, the Spyder X2 will cost you less than $300. and it will make a big difference to your images.

I find that the Apple MacBook Pro laptops hold their calibration pretty well, but I choose to run the Spyder software on my computers every three months to make sure they stay calibrated.

For many years I have been printing my images (4x6, 5x7, 8x10 and up to 13x19) on the Canon Pro-1000 printer, and as of 6 months ago I got a Canon Pro-4100 large format printer. When I am using higher cost paper and ink for these printers, I want to know that my images are color corrected prior to printing them. More on the new printer in my next blog post!

You can get more information on the Spyder products using the following links:

Datacolor Spyder calibrators: https://www.datacolor.com/spyder/spyder-monitor-calibrators/

Spyder X2: https://www.datacolor.com/spyder/products/

__________________________________________________________

Subscribe to the Jeff Cable Photography Blog by clicking HERE!
_________________________________________________________________
If you are interested in purchasing ANY equipment, please click here to go to B&H Photo, as I get a referral from them if you enter this way. It does not change the cost to you in any way, but it helps me keep this blog up and running.
_________________________________________________________________
Check out my upcoming photo tours to amazing places around the world. I have photo tours to Africa Costa Rica and more. And Canon will loan you any gear you want for FREE for any of my tours. 

_________________________________________________________________