Monday, July 19, 2010

Photographing smoke - Too much fun!

As many of you know, last week I decided to try photographing water droplets with some create reflections. I had so much fun doing this (with my son by my side) that it was time for a new challenge. This time, I decided to try capturing the beauty of smoke. So...of we went...to the store to buy sticks of incense.


Using one off-camera flash to "freeze" the motion of the smoke, we were able to capture some really cool shots. I don't think I will ever see a plume of smoke the same way again. As we shot these images, we were just amazed at the beauty of the patterns.


Here is a picture of the setup. I started by draping my black Westcott backdrop over a curtain rod. (I actually have their backdrop stands which I love - but was too lazy to use them.) I had one Canon 580EXII flash set up to the right of the smoke (being triggered by the new pocket wizard TT5). I wrapped the Honl flash modifier around the flash so that the light would not hit by lens or the backdrop. You might be wondering why there is a banana on the table. Well...I could not find anything to stick the incense into, so I grabbed a banana, poked the incense into the thing, and voila, an incense stand. I pre-focused the camera on the stick of incense, turned out the lights in the room, and using a flashlight to see the smoke patterns, I started shooting to get the right exposure settings (covering the flashlight each time).


Look closely at each of the patterns. They are so amazing.


Since the room was very still (after closing the door and turning off all the fans), I would wave my hands gently or blow slightly towards the smoke to give it movement.


I am not sure how I got this cool smoke curl at the top of this one, but I love it!


The blue color of the smoke was not something that I changed in Photoshop, it was a change to the white balance setting of the camera (set to Tungsten). The only modifications that I made in Photoshop were, erasing some of the specs of dust that were also illuminated and darkening the blacks to hide any imperfections in my lighting.


This one looks like it has repeated scrolls in it.


For this pattern, I had my son move the banana (incense holder) back and forth just a little bit to create the movement in the smoke.


It might be the result of breathing too much of this incense, but this last image sure looks like a genie rising out of the smoke, doesn't it? I want to take this image and add a genie bottle to the bottom but have not had the time yet.

Saturday, July 17, 2010

More studio shooting with Bridget as my model

Last week, I was still working to fine tune my studio lighting here at the house. I asked my neighbor, Bridget (since she has been my model for many years now), if she could come over and help out. So...as always, being the willing subject and having to endure my trial and errors, she came by for a little studio time.


We started by shooting images against a white backdrop with 3 lights. I had one large softbox on my left side (with a strobe behind it), a smaller softbox on the right with a Canon 580EXII attached, and then another Canon flash on the floor behind Bridget to help illuminate the white backdrop.

Then after shooting for a while, I decided to add some color to the image by placing a colored gel on the floor flash to change the white background to a more colorful back drop.

With this shot (above) I added a purple gel to the flash and set the exposure of the camera to accentuate the color.


This is an illustration of the setup, so that you can get a better idea of the lighting placement. (BTW - this image was created using a free App called Strobox on the iPhone)


For this last shot, I added one more flash (behind Bridget and to her left) to give some hair light. As you can tell, we also changed the gel color to a pink gel to compliment the pink in her shirt.

The lighting setup is still a work in progress, but I am getting a little closer to being happy with the results.

Tuesday, July 13, 2010

Shooting images of water drops - fun stuff!

As a photographer, you always want to get outside of your comfort zone and try something new. With that in mind, I set out to try something new this weekend. After seeing a very cool image of a water drop that was posted by another photographer, I thought that I should give this a try.


The end results (some of which you are seeing here) are really cool, but it took a ton of images and trial and error to get these keepers. I took almost a thousand images with my Canon 5D Mark II in burst mode, hoping to get the water droplets in the right moment of action.


In many of the images, I had either no drops of water or nothing of interest in the frame. In others, I had the drops of water but they were out of focus or lit incorrectly.


You will notice that each image has a different color reflection in the water. I was pointing the camera at the bowl of water, but I was trying different pieces of wrapping paper in the background (and pointing the flash at the paper) to get fun reflections off the water.


In the shot above, I actually moved one of my wife's potted plants behind the bowl of water. The green and purple that you are seeing in the water is a reflection of the leaves and flowers. For all of these images, I used the Sigma 150mm macro lens.


Sometimes I would catch one drop of water coming down (from the plastic bag suspended above the bowl) and other times I would catch multiple drops.


It is amazing how beautiful water drops are. I was amazed at the shapes and patterns that I captured with the camera. All frozen at 1/200 sec using the flash to freeze the action.


You will notice that I changed the angle of my camera to get different looks. In the close-up shot (2 above) I was shooting almost directly across the water. In this last image, I was shooting from above, looking down at the water. In this image, the ripples were caused by a preceding drop and then this drop was just about to impact the same spot.

As I look back at all these images, it is hard to believe that I was using clear water. It looks like I used color additives or Adobe Photoshop, but trust me, this was all reflected colors.

Saturday, July 10, 2010

Photographing a swim meet

Today was another one of the kid's swim meets and I decided to break out the camera gear and shoot some images for the first time this season. As I walked around the pool deck, numerous people asked me the best way to set up their DSLR for shooting this sport. I thought that I would blog the information to share with others.


The key to shooting most sports is to freeze the action. I generally like to have a shutter speed of at least 1/500 to freeze the action. In this case, being outside and with lots of light, this is not very hard to achieve. I set my camera to Aperture Priority (AV on the Canon camera) and set my aperture to f8. This gave me plenty of shutter speed (1/4000 at ISO 320) but also gave me a little more focus area as opposed to shooting at f4 or f5.6.


Along with a fast shutter speed, you want to make sure to have your camera in the servo focus mode as opposed to the single shot focus mode. With this setting, your camera will stay in focus as your subject is moving towards (or away from) you. The one challenge when using this mode with swimming is that many times your camera will try to focus on the splash and not the swimmer. Keep your focus point to the center point to make your focusing faster and more accurate.

Another thing to keep in mind is your subject matter and your perspective. Here are some pointers that might help you get a better shot of your favorite swimmer.

* Don't just shoot images from one side of the pool. Move around and try shooting straight down the lane (if you can stand in that position).
* Get low to the pool. I mostly see people shooting images from a standing position which is not nearly as good as getting low to the action.
* Look at the sun and try to shoot images for the sunny side to avoid harsh shadows.
* Look for different angles to shoot from, thinking about your foreground and background. In the image below I decided to shoot through the legs of a swimmer (on the platform getting ready to take the next leg of a relay).


I hope that this will help you get better shots the next time you are photographing poolside!

Monday, July 5, 2010

Studio Shooting - Stepping way outside my comfort zone

I have photographed lots of different subjects; people, landscapes, wildlife, events and goodness knows how many other situations, but the one environment that I have avoided until now, is the studio. Well...last week I decided to try something new and step into a studio. Yep...big lights, soft boxes and backdrops. I have avoided this type of shooting for two reasons, firstly I do not have a whole lot of extra room at my home to set up all this equipment, and secondly I love shooting in natural light. But, as in any career growth, I decided to learn a new skill.


I visited a local studio where I could try out this foreign style of shooting. We had a model named Nicole who was patient with me as I experimented with the different lighting options.

This is a whole different beast from shooting outside. There are many advantages. For one, I could control all of the light and not have to rely on the lighting of Mother Nature and light modifiers. I could also shoot day or night and have the same results. That is nice. The clarity and contrast of the images was amazing when I was shooting with big bright lights and a white background.


Funny enough, my favorite image from the evening was this shot that I took of Nicole outside the studio. It was towards the end of the day and the sun was low. I asked if we could shoot out by this pretty plant (growing on a cyclone fence by the parking lot) and she agreed. I guess I really am a natural light photographer at heart. :)


I came home that night and decided that on the following day I would finally break out the studio lights, soft boxes and light stands that have been sitting in their original boxes for the last couple of years. Since my kids would have nothing to do with this experiment, my neighbor (and "other" daughter - Ali's best friend), Danielle stepped in as my guinea pig. As you can tell from the not-so-perfect white background, I have some work to do still. But at least I broke out the big lights and have started learning something new!

Wednesday, June 30, 2010

More photos from Yosemite

The Moonbow picture (from the previous blog entry) made it onto the evening news tonight. That was fun to see.


And...as promised...here are some more pictures from my trip to Yosemite.


I took this picture of Half Dome from the ever popular Tunnel View vista. I used my 400mm lens to isolate this amazing formation. The pink color is from the sun which is about 5 minutes from setting to the West.


This is an HDR shot from the same vantage point.


I took this shot the following morning because I really liked the morning light coming off of the stem of the flower.


I was teaching one of the Canon students how to shoot macro shots and came across this really pretty blossom. There is something about the simplicity of the image and the curve of the stem that made me pick this particular flower. Believe it or not, I use my Canon 100-400 lens to shoot this. How did I get a macro shot out of that lens? I used the Canon 500D macro filter which converts this long telephoto lens into a macro. So cool!


After teaching students in the Yosemite Valley, we decided to take a drive out to Hetch Hetchy Dam to check it out. Along the way, we came across some great wildlife. This raven landed right by me and basically refused to leave. I kept getting closer and closer to him and he would stare me down as if it were a challenge.


I thought that this little "guy" was in a great position to be photographed (right on the edge of the water). When I got home and started editing the images, I noticed that this little critter was not a guy at all. The detail of the 21MP image let me see all the details, including the fact that she must be feeding little ones.


Curled up on the dam itself was this little snake. Again, using the 100-400 lens with the Canon 500D macro filter, I was able to get in nice and close to this guy. Cool red tongue, huh?


And to my amazement, right in the middle of the day, we came across this big black bear who was out eating in a field (probably around 3pm).


This last shot was taken at 6am. We woke up hoping for some great sunrise shots, but the clouds all but obscured the sun. So, I took 5 shots (all one stop apart) of the "Three Brothers" and created this HDR shot of the sky and reflection.

Sunday, June 27, 2010

Yosemite Falls presents - The Moonbow!!!

I just returned from another quick trip to Yosemite Valley, where I was lucky enough to spend some times with my friends from Canon and also well-known outdoor photographer, Lewis Kemper. I was only able to stay there for two nights since I had other commitments back home, but it was not a wasted trip by any means. This happened to be one of the rare nights where one of the most elusive occurrences in Yosemite can happen. This is called a "Moonbow" and it only occurs when the following things happen:

1. The skies must be clear enough for the moon to shine through (which did not happen on the first night)
2. There must be enough water coming off the falls to create the right amount of mist at the base
3. A bright moon (preferably a full one)
4. The correct angle of the moon from the falls
5. The photographer needs to be at the right angle to capture the moonbow.

Even though we had started shooting at sunrise (5:30am) and had photographed and taught all day, we were determined to get to this shot. So, at 11:30pm we arrived at the meadow across from Yosemite Falls and set up for nature's one hour show.  I had an idea of how I would shoot this event, but two things caught me by surprise. The first was how tough it was to focus the camera in near darkness. At the beginning, I had set the lens to focus at infinity and hoped that it would be sharp. I ended up finding the right distance but I can tell you that the first ten images were useless. The second thing that surprised me was that the moonbow is not visible to the human eye, only to the camera. So...I was looking at the falls and waiting for the "event" to start when, in actuality, it already had. If it hadn't been for the hundreds of other photographers there, I might have missed this. Live and learn!

You can click on this image to see it a little larger

But...in the end I came up with a couple of images which really show off the Yosemite Falls Moonbow. This one is my favorites. Mother Nature is Awesome!!!!!

More Yosemite images to come (but none as memorable as this one).

Wednesday, June 23, 2010

Steve Wozniak (After Apple and before "Dancing With The Stars") introduces me to my first digital camera

Many people ask me how I got interested in digital photography and they are surprised when I tell them that it all started with Steve Wozniak, the founder of Apple Computer. Yes, the Woz himself!

I was fortunate to meet Steve more than 25 years ago, back when the Apple II was still in the Apple lineup and digital cameras were not available yet. We became friends back in the late 1980s. I think it was my love of technology and my "early adopter" mentality that formed that common bond between us. It clearly was not my level of intelligence or math skills!

On one of Steve's many trips to Tokyo, he came back with a couple of, at the time, cutting edge digital cameras, called the Ricoh RDC-1. This thing could take a digital picture at a whopping 640x480 resolution. That's right...not even one megapixel. :)


I think that the camera sold then for about $1500 and the LCD was an option. The camera used the old SmartMedia cards and I think I had about 5 of the 8MB (not GB) cards. Woz gave me one of these cameras and the rest is history. I was amazed at the immediacy of digital photography and used the camera often. After that, Woz and I would make numerous trips to Japan to shop for the latest and greatest digital cameras. Those trips were fun!

So...it is due to Woz's generosity and kindness that I got the photo bug.

A couple of years ago, my daughter had to do a school project on someone famous and she picked Steve Wozniak. What could be better than going directly to the source for a school project. While we were up at Steve's house, I shot off some images for her project board.

This was my favorite shot from that day, with Woz and his reflection.

Here is Ali taking copious notes for her school project while Steve patiently waited and answered her questions. He is every bit of the nice guy that you all saw on "Dancing With The Stars".

Not only do I credit Woz with my early interest in digital photography, he also ignited my interest in high-tech gadgets, cool cars and countless other fun stuff. Thanks Steve!

Oh - and Ali got an "A" on her report. :)

ADDED JULY 2, 2010-  RESPONSE FROM THE EVER HUMBLE WOZ: "Way too much credit. You did much more to get me into 'good' cameras and the like. And the skill is in yourself. The right thing is to thank friends for being along as you went in certain directions. "

Thursday, June 17, 2010

Photographing animals at the San Francisco Zoo

Yesterday I made another trip to the San Francisco Zoo; this time to shoot images for an article I am writing for Lexar's Digital Photography web site. The article will give tips on how to better photograph zoo animals. I was hoping for some of that good ole' San Francisco fog to give me nice even light, but even though I showed up right at 10am (the opening of the zoo), it wasn't to be. The sunlight was pretty intense. But, I made the best of the situation and set out to capture some "good images" and some "what not to do" images. Here are some of my favorites.

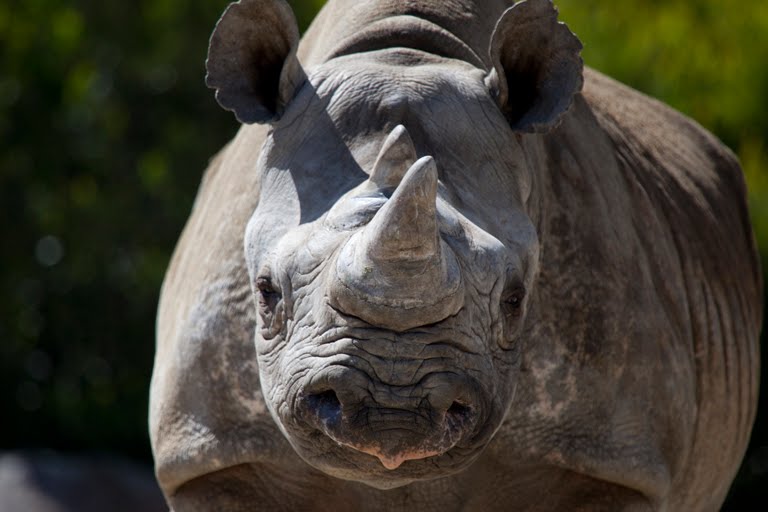
I was the only one hanging out by this guy and I swear that he was staring me down.

I walked by the lion pen at least 4 times, and each time they were laying down in the back, out of site. Finally, on my last attempt, they had made their way back towards the front of the exhibit. This guy had his head down and, as I stood there waiting to see if he would look up, he seemed content to wait me out. I remembered a trick that I had used a couple of years ago. I pulled out my car keys and rattled them, thus simulating the noise that they associate with their keeper (and therefore food). That worked! He looked up at me numerous times and even got up and meandered around for a while.

Look - a three headed giraffe!

I used this image in my article to demonstrate the importance of focusing on the animal's eyes. I shot this at f2.8 to diffuse the background and draw the viewers attention to the bird.

This Mandrill, Jake, was my favorite subject at the zoo. He had great colors in his face and on his back side. I must have stood by his area for 45 minutes trying to get a decent shot of him. The bad lighting wasn't helping me in this quest. He must have paced around his pen at least 25 times before I left. I can not tell you how many times I heard kids walk by and say "hey - has a funny looking butt!". Too funny.

For the article, check out www.lexar.com/dp in a week or so.

Tuesday, June 15, 2010

A demonstration of Lexar high speed memory cards

Lexar just posted this video demonstration of me comparing the speeds of the 80x, 300x and 600x memory cards, while shooting sports. I asked my daughter's good friend, Jamie, if she could come by and juggle a soccer ball for this and she did a great job.

See for yourself.
You can also see the HD version of this video at:
http://www.youtube.com/watch?v=KLDeUCzOlw0

Sunday, June 13, 2010

Same location - totally different light!

When I was in San Diego scouting locations for a video shoot, I just so happened to be 5 minutes away from my nephew's workout spot. He is an amazing athlete who just might be in the Olympics someday. We rigged him up with a HD waterproof video camera (strapped to chest in the image) and sent him back out for his daily practice.

It was late in the day and with the sun to my right, I figured that the only good shots of him would be to my left, facing away from the sun. So I shot the following couple of images when the opportunity arose.


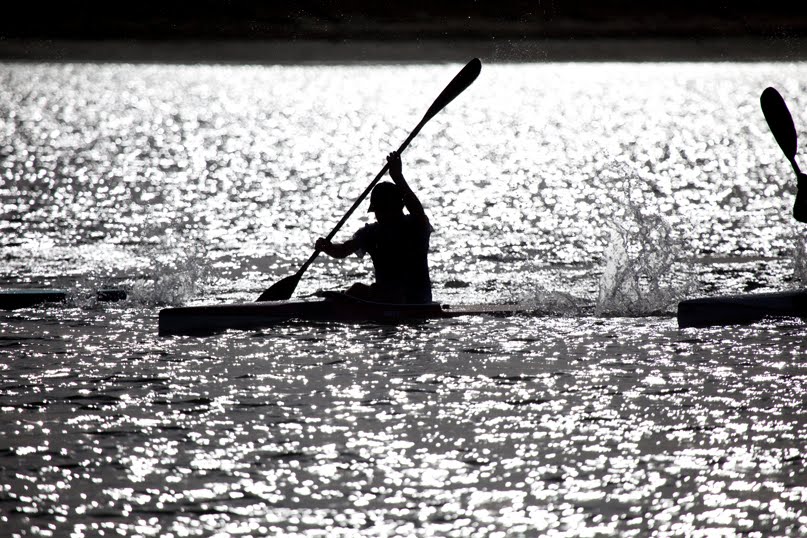
And then...when I was shielding my eyes and trying to look to see if he was coming back towards me, I saw another interesting shot. I knew that this would look totally different from the other pictures, but I also figured that it could be interesting with the silhouettes. So...I fired off some shots and came up with the image below.

We don't get to see his face in this shot, but the feel is totally different in this photo. This was my favorite image of the day. Taken within minutes of each other - but using the sunlight in a totally different way. This is why it is always a good idea to look in all directions when shooting pictures. You just never know what you are going to capture. And, of course, with high capacity Lexar memory cards in my camera, why not take some risks and see what comes up?


Wednesday, June 9, 2010

Two Stanley Cup Winners from the Chicago Blackhawks - Brad Aldrich and Patrick Kane

The Chicago Blackhawks just won the Stanley Cup. I am so happy for my friends over there. Here are two guys who have now hoisted the cup and celebrated the ultimate trophy. I shot this image of Brad Aldrich (video coach) and Patrick Kane (game winning goal scorer) at the Team USA party at the Vancouver Winter Olympics. Congratulations guys - you did it!

(Photo removed for privacy reasons)